To create a
Poster:
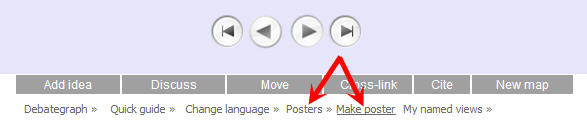
(1) Go to the map to which the
Poster will refer, click on the
Posters>> link (at the bottom of the map) and then click on the
Make poster link that opens to the right.
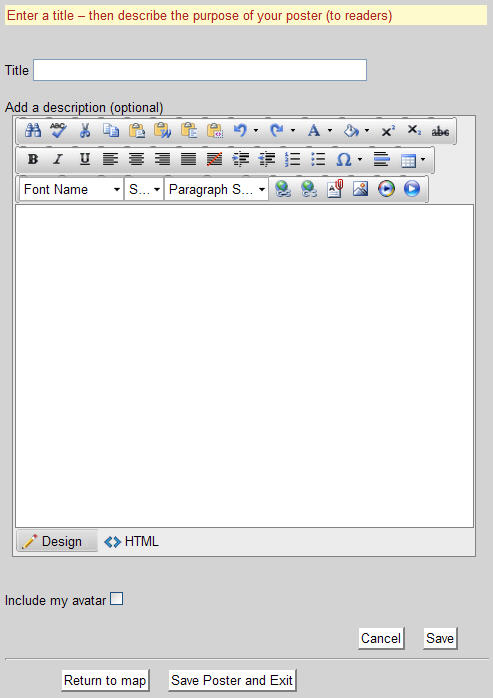
(2) On the
Poster Builder page that opens, enter a
Title for the
Poster and (if desired) an introductory description (the text, images and video etc that will be displayed in the lavender introduction box on the
Poster). Then, click the
Save button.
(3) After saving the
Poster Introduction, the
Introduction is displayed above the editing panel, and the editing panel can be used now to add the first
Poster Item. 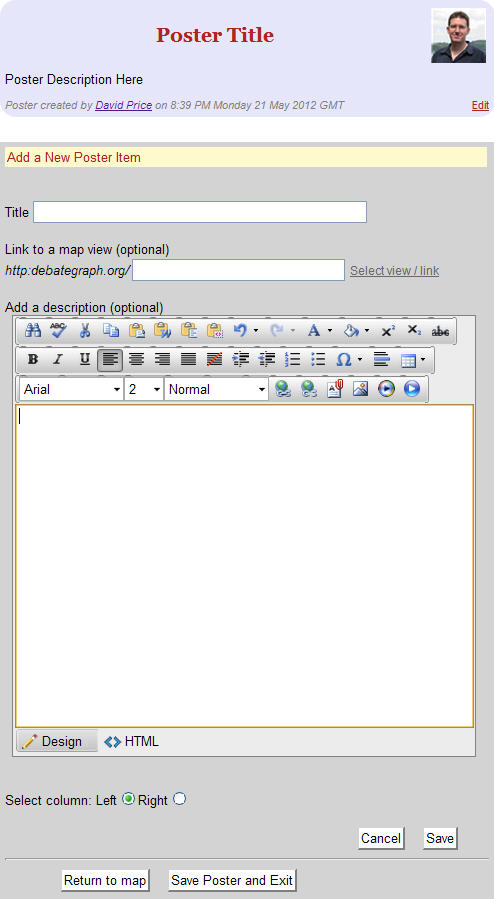
(4) To add the first Poster
Item, enter a title for the
Item plus any associated text, images and video etc in the details box, and then (optionally) enter or select a specific view of a map to which you would like the
Item to link. The
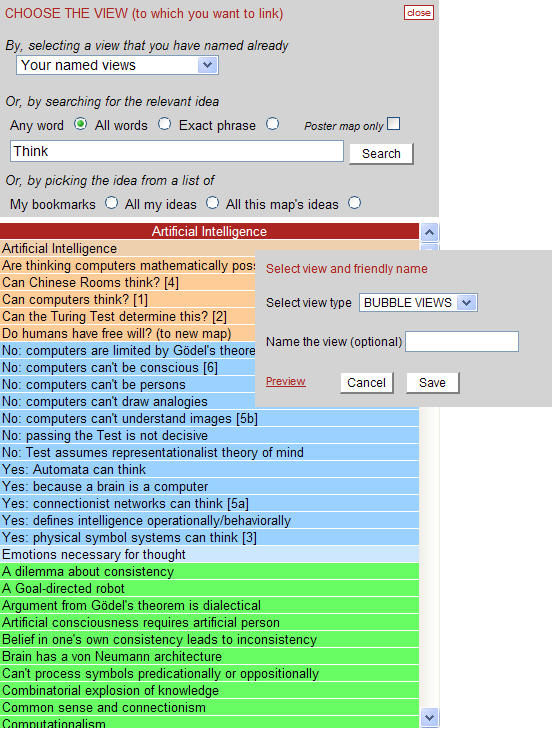
Select view / link lets you find the idea to which you would like the
Item to link, and to define the view of that idea that you would like to open from that
Item on the
Poster.
(5) You can also use the Column radio button selector on the editing panel to indicate whether you would like this Poster Item to be displayed in the right or left columnn on the Poster. Once you have finished, click the
Save button to save the Poster
Item. 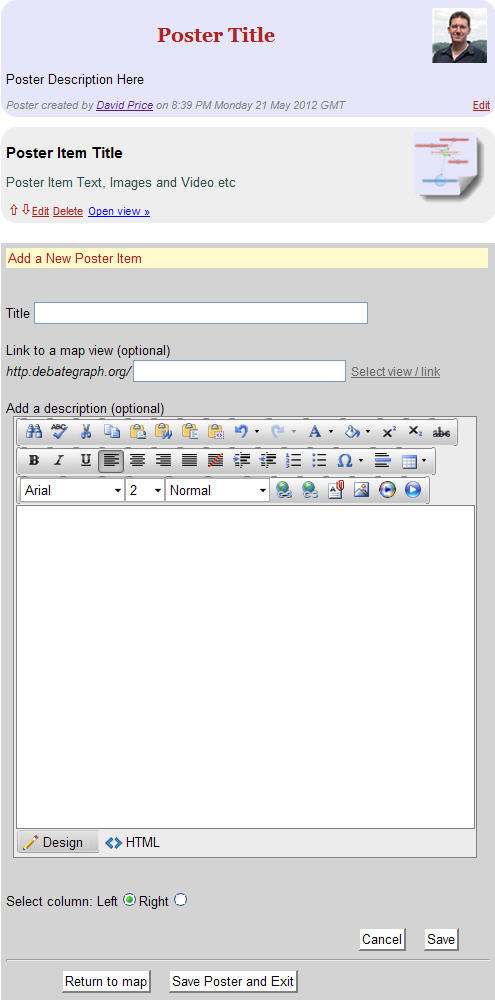
(6) The first
Poster Item will be displayed above the editing panel now, and you can use the editing panel to enter as many more
Items as you wish (and use the up and down arrows on the
Items in conjunction with the Column radio button selector to determine the positions of the
Items on the
Poster). You can also re-edit the Poster Introduction and Items at any time by clicking on the relevant Edit link. Once you have finished building the poster (or are ready to take a break), click the
Save Poster and Exit button.